What Is Aluminum Foil Boat?
Aluminum foil boat crafting is a DIY endeavor blending challenge with creativity, emerging as a popular activity combining creative exploration with hands-on enjoyment. The material selection strategically harnesses aluminum’s inherent advantages: exceptional malleability coupled with ultra-lightweight properties.
Aluminum foil boats are cost-effective, easily accessible creations that balance aesthetic appeal with practical versatility, serving multiple purposes across various activities. This step-by-step guide in this article walks you through mastering the foil boat crafting process.
First, understand aluminum foil boat benefits and key features. Next, design the hull’s structure and purpose, pick suitable materials and tools, then adjust buoyancy and stability. Finally, customize your boat with a personal touch.
I. Understanding Buoyancy
A. Definition and explanation of buoyancy
Buoyancy is the upward force exerted by a fluid, such as water, on an object immersed in it. It is the result of the pressure difference between the top and bottom surfaces of the object. When the buoyant force is greater than or equal to the weight of the object, it floats.
B. Archimedes’ principle and its relevance to boat-making
Archimedes’ principle, formulated by the ancient Greek mathematician Archimedes, states that an object immersed in a fluid experiences an upward buoyant force equal to the weight of the fluid it displaces. This principle is crucial for understanding how boats, including aluminum foil boats, float.
C. Factors affecting buoyancy
Several factors influence the buoyancy of an aluminum foil boat. The amount of water pushed aside by the boat’s hull, the boat’s own weight, and how weight is spread out inside the boat all affect how well the boat stays afloat. By considering these factors, you can design and construct a boat that achieves optimal buoyancy and stability.
II. Gathering Materials and Preparation
A. Gathering aluminum foil
To begin your aluminum foil boat-making adventure, gather a sufficient amount of aluminum foil. Look for a roll of standard kitchen-grade aluminum foil, which is readily available in most households. Ensure that you have enough foil to construct the boat’s hull and any additional structural elements.
B. Choosing the right type and thickness of foil
When selecting aluminum foil for boat-making, consider the thickness of the foil. Thicker aluminum foil (heavy aluminum foil) tends to be more rigid and provides better structural integrity for the boat.
However, if you prefer a more lightweight and flexible boat, you can opt for thinner foil. Experiment with different thicknesses to find the balance between durability and maneuverability that suits your needs. In general, we recommend using aluminum foil that is approximately 0.016 to 0.04 inches (0.4 to 1 mm) thick.
C. Ensuring a clean and flat surface for construction
Before you start constructing your aluminum foil boat, make sure you have a clean and flat surface to work on. This will ensure that the foil remains free from dirt or debris, and it will facilitate the folding and shaping process. A smooth tabletop or countertop would be an ideal surface for boat construction.
III. Designing Your Boat
A. Considering the boat’s purpose and requirements
Before you begin constructing your aluminum foil boat, think about its purpose and requirements. Are you building it for a race, a floating decoration, or a science experiment? Understanding the boat’s intended use will help you make design decisions that align with your goals.
B. Sketching and planning the boat design
Take some time to sketch and plan your boat design before you start folding the aluminum foil. Consider the overall shape, size, and layout of the boat. A simple rectangular or triangular hull design is a good starting point for beginners. Sketching will help you visualize the boat and make adjustments before committing to the construction phase.
C. Structural considerations for stability and weight distribution
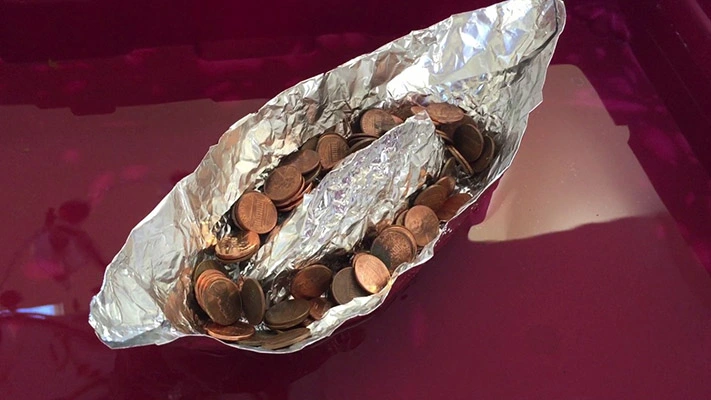
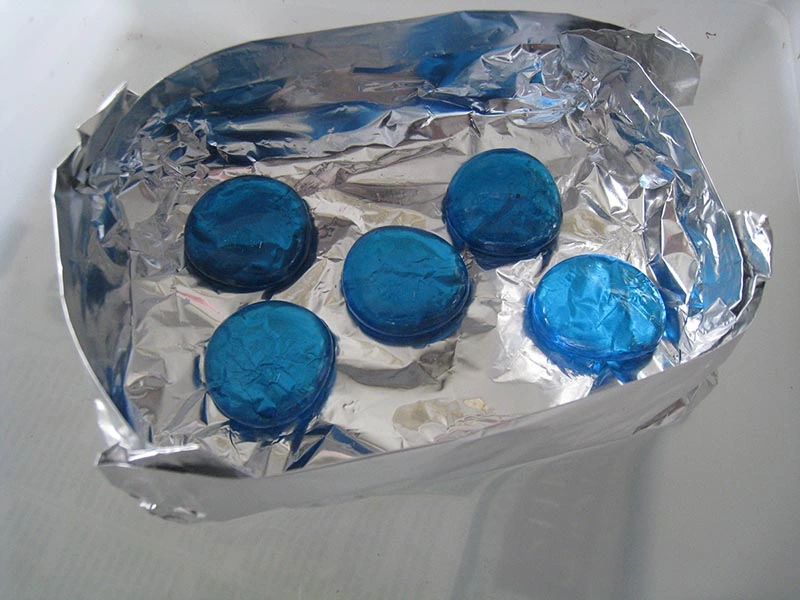
To ensure stability and proper weight distribution, think about the structural elements of your aluminum foil boat. Consider adding side walls or compartments to increase buoyancy and prevent tipping. Distribute the weight evenly by placing heavier items, such as small weights or coins, low in the boat’s hull. This will help maintain balance and stability in the water.
IV. Constructing the Hull
A. Creating the base of the boat with aluminum foil
Start constructing your aluminum foil boat by creating the hull, which forms the base of the vessel. Cut a piece of aluminum foil large enough to accommodate your desired boat size. Lay it flat on the clean surface, ensuring there are no wrinkles or creases.
B. Folding techniques for shaping the hull
Use folding techniques to shape the aluminum foil into the desired hull form. Fold the foil along the edges to create a shallow “U” shape, resembling the bottom of a boat. Make sure the folds are crisp and secure to maintain the structural integrity of the hull. You can use your fingers or a ruler to achieve clean, straight folds.
C. Reinforcing the hull for added strength
To reinforce the hull and add strength to your aluminum foil boat, consider doubling the layers of foil. Put another piece of foil on top of the first layer and fold the edges over to hold them together. This will provide increased durability and resistance to potential punctures or tears while the boat is in water. Ensure that the folds align properly and that the two layers are securely attached to each other.
V. Adding Structural Elements
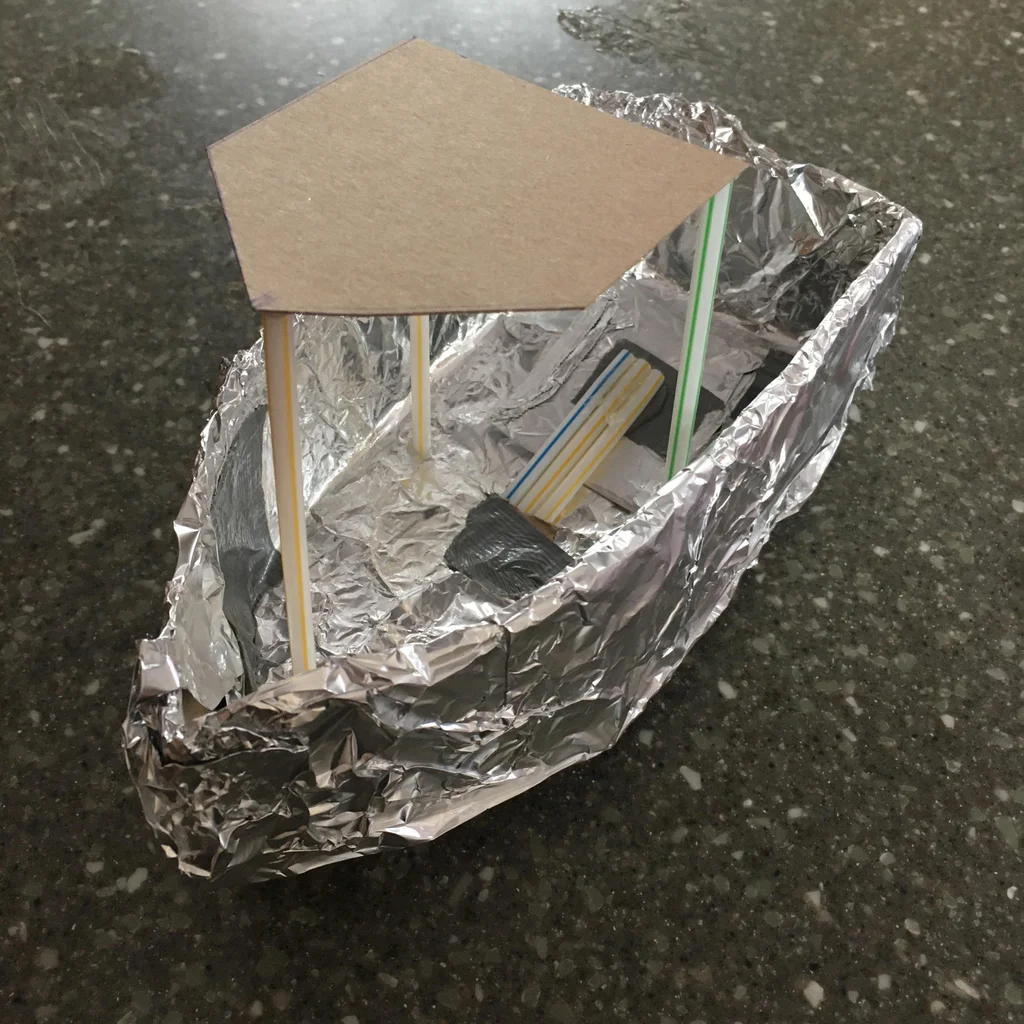
A. Building the sides and bow of the boat
Once you have constructed the hull, it’s time to add the sides and bow to your aluminum foil boat. Cut smaller pieces of foil and fold them to create walls along the sides of the boat. Attach these walls to the edges of the hull, ensuring they are securely folded and connected. Similarly, create a pointed shape for the bow by folding a piece of foil and attaching it to the front of the hull.
B. Techniques for creating walls and compartments
If you wish to incorporate compartments or sections within your aluminum foil boat, you can use additional folding techniques. Fold the foil vertically to create dividers or partitions within the boat’s interior. This will help distribute the weight evenly and enhance stability. Remember to secure the folds properly to maintain the integrity of the compartments.
C. Attaching additional support beams or braces
Depending on how big or shaped your foil boat is, you might need to add extra supports or reinforcements to make it sturdier. Cut narrow strips of foil and fold them to create beams that span across the width of the boat. Attach these beams to the walls or hull to provide extra reinforcement. This will help prevent the boat from flexing or bending excessively while it floats.
VI. Finishing Touches
A. Smoothing and refining the boat’s surface
After constructing the basic structure of your aluminum foil boat, take some time to smooth and refine its surface. Use your hands or a soft cloth to gently press and smooth out any wrinkles or imperfections in the foil. This will give your boat a cleaner and more polished appearance.
B. Ensuring water tightness and preventing leaks
To ensure that your aluminum foil boat remains watertight and prevents leaks, pay attention to the seams and folds. Press along the edges and folds to create a tight seal. If you notice any gaps or areas where water might seep in, reinforce them with additional folds or small patches of foil. A watertight boat will float better and keep your spirits high during experiments or races.
C. Adding decorative elements if desired
If you want to make your foil boat more creative and personal, consider adding some decorations. Use colored markers or adhesive stickers to create designs, patterns, or even a name for your boat. Just remember to keep the added decorations lightweight and avoid obstructing the boat’s functionality or stability.
VII. Testing and Adjusting
A. Conducting a float test in water
Once you have completed the construction of your aluminum foil boat, it’s time to put it to the test. Fill a container or basin with water, making sure it is deep enough to fully submerge the boat without touching the bottom. Gently place the boat in the water and observe its floating behavior.
B. Observing the boat’s stability and balance
As your aluminum foil boat floats, observe its stability and balance. Does it float level or does it tilt to one side? Is it stable or does it easily tip over? Check for any uneven areas or parts that might need adjusting or strengthening to enhance the boat’s performance.
C. Making necessary adjustments for optimal performance
Based on what you saw during the float test, make any changes needed to improve how well your aluminum foil boat works. This might involve redistributing weight, reinforcing weak areas, or modifying the design slightly. By iteratively testing and adjusting, you can achieve a well-balanced and seaworthy vessel.
VIII. Safety Considerations
A. Wearing appropriate safety gear
When engaging in any hands-on activity, including aluminum foil boat-making, it’s important to prioritize safety. Make sure to wear proper safety gear, like protective gloves, to avoid cuts or scrapes when handling aluminum foil or sharp objects.
B. Supervising children during the boat-making process
If children are involved in the boat-making process, ensure they are supervised at all times. Provide age-appropriate guidance and assistance to ensure their safety and prevent any potential hazards. Emphasize the importance of following safety guidelines and handling materials with caution.
C. Avoiding sharp edges or potentially hazardous materials
While constructing your aluminum foil boat, be mindful of sharp edges that could cause injury. Fold the foil carefully to avoid creating sharp points or edges. Also, avoid using any harmful materials when building the boat, especially if you plan to test it in water.
Alternative Boat-Making Techniques
While aluminum foil is a popular choice for boat-making, there are alternative materials you can explore. Consider experimenting with materials like plastic wrap, wax paper, or even recycled materials such as cardboard or plastic bottles. Each different material has its own unique properties and challenges, helping you learn more about buoyancy and boat design.
Beyond the traditional hull designs, you can also experiment with different boat shapes and configurations. For example, you can create a catamaran-style boat by connecting two hulls with a bridge or try a pontoon-style boat with multiple buoyant sections. These variations can offer different levels of stability and maneuverability, providing an opportunity for further exploration and creativity.
If you want to take your aluminum foil boat-making to the next level, consider incorporating propulsion systems. You can attach a small fan or paddle wheel to the back of your boat and experiment with different methods of propulsion, such as wind power or manual paddling. This adds an exciting element to the project and allows you to explore the engineering principles of boat propulsion.
Summary
Building an aluminum foil boat is a fun and instructive exercise that teaches you about buoyancy, boat design, and construction concepts. You may build a well-designed and seaworthy vessel by learning the fundamentals of buoyancy and following the methods indicated in this guide. Remember to be creative, to experiment with different materials and ideas, and to have fun as you embark on your aluminum foil boat-making adventure.