What Is Foil Bubble?
Aluminum foil bubble film is made of aluminum foil and bubbles laminated together. The outer surface of the bubble film is a layer of aluminized film. It is a new type of thermal insulation material. This product is mainly used in sunshade, insulation, floor heating and construction industries. According to the specifications, it can be divided into single foil bubble insulation and double bubble foil insulation.
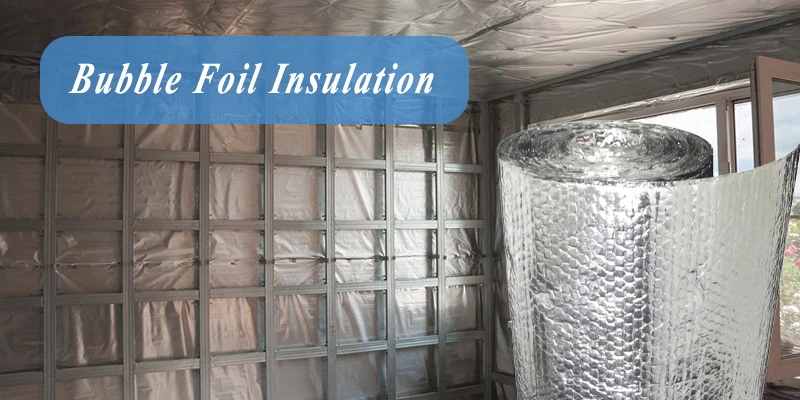
Benefits of Bubble Foil Insulation
Bubble reflective insulation is a lightweight, high-performance thermal barrier composed of aluminum foil layers bonded to polyethylene (PE) bubble film. Below, we examine its key advantages in detail.
Superior Thermal Performance
- Reflective Insulation Principle: The aluminum foil (≥95% reflectivity) reflects up to 97% of radiant heat, reducing heat transfer in both hot and cold climates.
- Bubble Layer Function: The air in the bubbles slows conductive heat flow, with thermal resistance (R-value) ranging from R-3 to R-6 per inch, depending on thickness.
- Temperature Range: Effective in -40°C to 80°C environments, making it suitable for extreme climates.
Moisture and Vapor Resistance
- Aluminum foil blocks 99% of water vapor, preventing condensation and mold growth in damp areas (e.g., basements, crawl spaces).
Lightweight and Flexible
- Thinner than traditional insulation, saving space in walls, roofs, and floors. It can be easily cut with scissors and installed without professional tools. Some features self-adhesive backing for quicker applications.
Dayanıklılık ve Uzun Ömürlülük
- UV-resistant variants are available for outdoor applications. No settling or degradation over time (unlike fiberglass), maintaining performance for 20+ years. Rodent-resistant, unlike foam-based insulation, which pests may chew through.
Multipurpose Applications
- Roofings: Reflective barriers reduce attic heat gain by up to 30°F (17°C).
- Walls and Floors: Enhances thermal comfort without adding bulk.
- Radiant Floor Heating: Improves heat distribution and reduces energy loss.
- HVAC Duct Insulation: Prevents heat loss/gain in air ducts.
- Cold Storage & Refrigeration: Maintains consistent temperatures with minimal moisture ingress.
- Greenhouses: Maximizes solar reflection while retaining warmth at night.
- Vehicle Insulation: Reduces cabin heat in cars, RVs, and boats.
- Cargo and Container Liners: Protects temperature-sensitive shipments.
How Does Foil Bubble Wrap Works?
Multiple heat transfer barriers
Reflective bubble foil insulation efficiently combats all three heat transfer mechanisms (conduction, convection, and radiation) through its unique layered structure:

The aluminum foil layer (≥95% reflectivity) blocks up to 97% of radiant heat. And the PE bubble film (5-10mm thickness) consists of closed air cells, which act as an insulating barrier. Still air has very low thermal conductivity (0.024 W/m·K)—similar to fiberglass. The trapped air minimizes direct conduction—unlike solid foam boards, which still allow slow heat transfer. The airtight structure prevents air circulation within the insulation.
| Layer | Malzeme | Function | Technical Data |
|---|---|---|---|
| Outer Layer (Reflective) | 99% Pure Aluminum (Polyester-reinforced in premium versions) | Reflects radiant heat | ASTM C1371 Emissivity: ≤0.03 (lower is better) |
| Middle Layer (Core) | Low-Density Polyethylene (LDPE/Bubble Film) | Blocks conductive heat | Thermal Resistance (R-value) = ~R-4 per inch |
| Optional Add-Ons | UV Stabilizers, Fire Retardants, Adhesive Backing | Customized for harsh environments | Flame Spread Rating: Class A/Class 1 (UL94) |
Common Mistakes When Using Bubble Foil Insulation
Bubble foil insulation is highly effective when installed correctly, but several installation errors can drastically reduce its thermal performance. Below, we analyze the most frequent mistakes and provide science-backed solutions:
Ignoring the Air Gap Requirement
Mistake: Installing foil insulation directly against surfaces without an air gap.
Solution: The reflectivity of aluminum requires an air gap for optimal radiant heat blocking. Without a gap, heat conducts through the foil, reducing effectiveness by 30–50%. Use furring strips, spacers, or standalone framing to create an air gap. Then, you can install it.
Incorrect Seaming and Overlapping Techniques
Mistake: No overlapping gaps or using duct tape instead of foil tape.
Solution: Gaps >3mm create thermal bridges—undermining insulation. Standard adhesives degrade, allowing moisture infiltration and peeling. Overlap seams by ≥100mm and seal with foil-faced HVAC tape (UL 181B-rated). For extreme climates: Use double-sided reinforced foil tape.
Wrong Installation Direction
Mistake: Placing foil insulation on the cold side (e.g., outside walls in winter).
Solution: Radiant barriers work best facing the heat source. If installed backward, it absorbs rather than reflects heat.
- Hot Climates: Reflect sunlight by installing under the roof (facing down).
- Cold Climates: Keep interior warmth by placing them behind wall/ceiling finishes (facing in).
- Mixed Climates: Use double bubble foil with an air gap on both sides.
Neglecting UV And Fire Safety
Mistake: Exposing standard foil to sunlight (UV) or fire risks.
Solution: Always select UV-stabilized foil (12+ month exposure resistance). Verify ASTM E84 Class A/1 flame spread rating for codes.
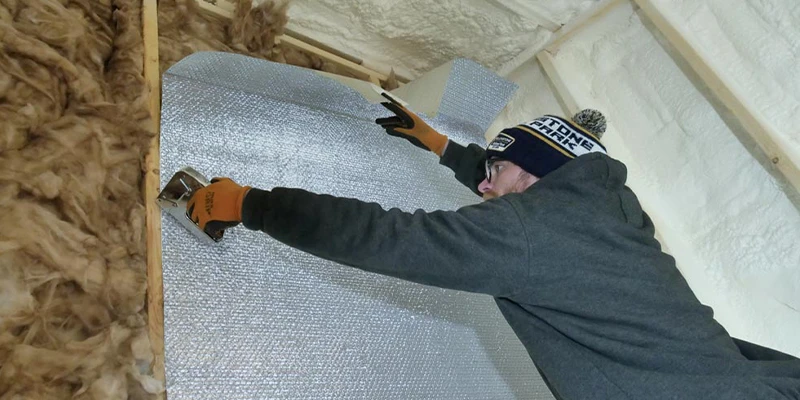
Step by Step To Install Foil Bubble Wrap Insulation
Bubble wrap insulation is an efficient way to improve thermal performance in attics, walls, and even ductwork. Below is a professional guide to maximizing its effectiveness.
Step 1: Choose The Right Type of Bubble Foil Insulation
Not all bubble foil insulation is the same-select the best type for your project:
| İsim | Best For | R-Value | Key Features |
| Single Bubble Foil | Attics, walls | R-2 to R-4 | One reflective side |
| Double Bubble Foil | Roofs, ducts, hot/cold climates | R-4 to R-6 | Reflects heat both ways |
| Perforated Bubble Foil | Crawl spaces, humid areas | R-3 to R-5 | Prevents condensation |
| Reinforced Bubble Foil | Metal buildings | R-5 to R-7 | Fiberglass scrim for durability |
Step 2: Choose The Right Tools
- Utility knife.
- Staple gun or reflective foil tape (UL 181B-rated).
- Tape measure and straightedge.
- Furring strips or spacers.
- Infrared thermometer (optional).
- Laser level (optional).
Step 3: Prepare The Installation Area
- Clean the surface: remove dust, debris, and moisture.
- Check the gap: Seal air leaks with spay foam or caulk.
- Measure and mark: Plan layout before cutting to minimize waste.
Step 4: Install With Proper Air Gaps
Without an air gap, reflective insulation loses up to 50% effectiveness (ASTM C1224). Minimum gap: 0.75″ from the next surface.
Installation Methods by Area:
| Location | Install Method | Air Gap Solution |
| Attics (under roof deck) | Staple to rafters | Furring strips or strapping (create 1″ space) |
| Walls (behind drywall) | Hang between studs | Offset with thermal break clips |
| Metal buildings | Glue or screw to framing | Standoff washers or corrugated spacers |
| Ductwork and pipes | Wrap with a 1″ gap | Foam-backed foil tape (prevents compression) |
Step 5: Sealing and Securing
Don’t:
- Overlap seams without taping, heat sneaks through gaps.
- Use staples alone, it can tear foil over time.
- Cover recessed lights or electrical boxes, it will fire hazard.
DO:
- Overlap seams by at least 4″ (100mm).
- Use foil tape (not duct tape)—it withstands heat and humidity.
- Stagger seams for better coverage.
Step 6: Check After Install
Airflow Test – Ensure no blockages in ventilation paths.
Inspect for Sagging – Reinforce with extra tape if needed.